Windows 11 includes a network adapter troubleshooter that can help diagnose and resolve common network connectivity issues. While the troubleshooter works fine, on most occasions, it can occasionally leave you puzzled with the ‘Windows could not find a driver for your network adapter’ error.

Various causes can trigger this error, such as corrupt drivers, third-party VPN services, or faulty Windows updates. Regardless of what’s causing the problem, the solutions below should help you resolve the error in no time.
1. Enable Network Adapter
Windows may fail to communicate with the network adapter if it is disabled. Follow the steps below to enable the network adapter on Windows 11.
Step 1: Click the Windows Search icon on the Taskbar, type in control panel, and press Enter.

Step 2: Change the view type to Large icons and select ‘Network and Sharing Center.’

Step 3: Select Change adapter settings from the left pane.

Step 4: In the Network Connections window, right-click on your network adapter and select Enable.

After that, run the network troubleshooter and see if Windows can detect your network adapter driver.
2. Update Network Adapter Driver
The ‘Windows could not find a driver for your network adapter’ error can also appear if your PC’s current network driver is old or corrupt. So, Windows may have trouble using the driver. You can update the network adapter driver from the Device Manager.
Step 1: Right-click on the Start icon and select Device Manager from the list.

Step 2: Double-click on Network adapters to expand it. Right-click your network adapter and select Update driver.

From there, follow the on-screen instructions to finish updating the network driver. After that, run the network troubleshooter again.
3. Reinstall Network Adapter Driver
If the error persists even after you update the driver, there’s a chance that the network adapter driver is corrupt. In that case, you can reinstall the driver to fix the error message.
Step 1: Press the Windows key + R to open the Run dialog. Type devmgmt.msc in the box and press Enter to open Device Manager.

Step 2: Expand Network adapters, right-click on your network adapter and select Uninstall device.

Step 3: Select Uninstall to confirm.

Step 4: Once removed, click the ‘Scan for hardware changes’ button at the top or restart your PC.
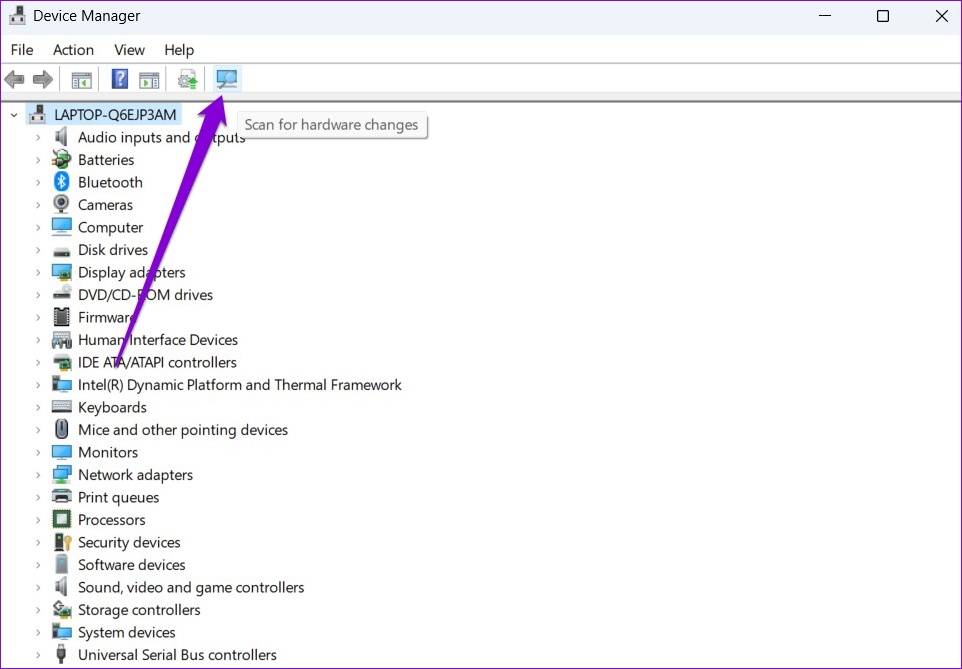
Windows should automatically install the missing network adapter driver. Following that, you should no longer see the ‘Windows could not find a driver for your network adapter’ error when you run the troubleshooter.
4. Change Power Management Settings
Windows may turn off your lesser-used devices and drivers if you’ve configured it to save power. When that happens, Windows will fail to communicate with those drivers and trouble you with such errors.
You can prevent Windows from turning off the network adapter driver by configuring its power management settings.
Step 1: Press the Windows key + S to open the search menu, type device manager, and select the first result that appears.

Step 2: Expand Network adapters, right-click on your network adapter, and select Properties.

Step 3: Under the Power Management tab, uncheck ‘Allow the computer to turn off this device to save power,’ and hit OK to save changes.

5. Temporarily Disable VPN
At times, a third-party VPN app or program on your PC can also interfere with Windows processes. To overrule this possibility, you can temporarily disable the VPN connection and try running the troubleshooter again.
If this gets rid of the error, you may want to consider using a different, more reliable VPN service.
6. Use System Restore
System Restore is a useful utility that creates a backup of your entire system regularly or before making major system changes. You can use it to revert Windows to its earlier state in case the above solutions don’t work. Here’s what you’ll need to do.
Step 1: Open the search menu, type in create a restore point, and select the first result that appears.

Step 2: Under the System Protection tab, click the System Restore button.

Step 3: Click Next.

Step 4: Select the restore point before the error first appeared.

Step 5: Review all the details one more time before hitting Finish.

Wait for your PC to restart and restore to the specified point. Following that, Windows should be able to detect the network adapter driver as before.
Detected Successfully
Network adapter drivers help Windows communicate with your network connections. When Windows fails to locate those drivers, you may have trouble connecting to Wi-Fi or using an ethernet connection. Rest assured, if you follow the above fixes properly, you should be able to fix the ‘Windows could not find a driver for your network adapter’ error on Windows 11.
Last updated on 17 August, 2022
The above article may contain affiliate links which help support Guiding Tech. However, it does not affect our editorial integrity. The content remains unbiased and authentic.
DID YOU KNOW
Up until September 14, 1995 domain registration was free.

